Step by Step Instructions for Growing Microgreens
Micro-greens are among the easiest plants to grow at home. Growing from seeds might be new and different experience but once you get hang of it you'll be hooked!
|
The miracle of seeds! Every seed contains all the food and energy it needs to burst out of its shell and start growing. Just add water. |
 Seedlings emerging from Rockwool Grow Cubes.
Let's Get Growing!
Supplies you'll need:
- Seeds - preferably organic
- Watertight tray
- 100 % jute grow mats
- Labels to mark planting date and type of seeds
- Sunny windowsill (or grow lights)

Day 1.
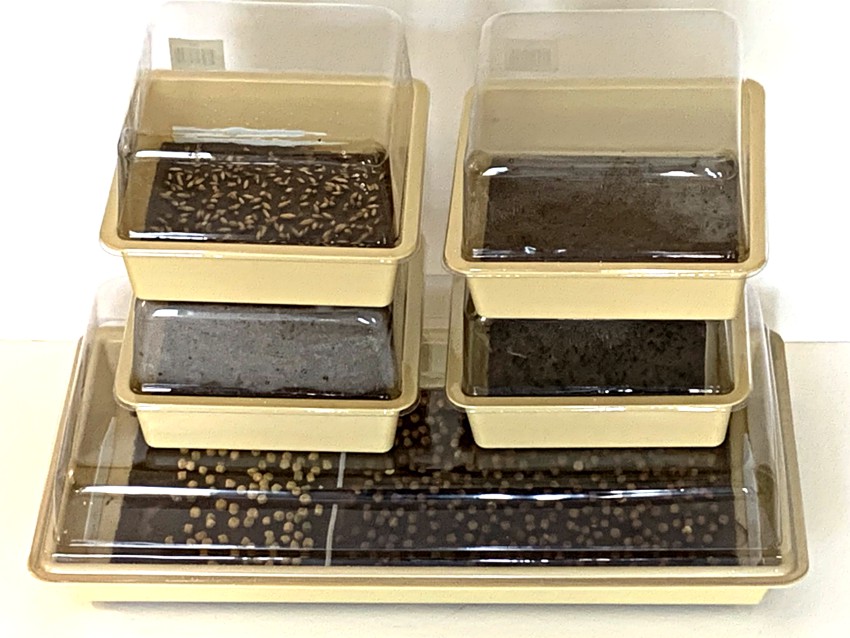
Preparing Trays and Grow Mats
Wash tray with a mild bleach solution. Make sure your grower tray is clean, clean, clean.
1. Position Grow Mat on bottom of grower tray. Our Grow Mats measure 19" x 9" and are designed to fit a standard 20"x 10" grower tray . If your tray is a different size simply cut the mat with a scissors to fit the tray.
2. Saturate Grow Mat. Pour water over pad until it is floating in about 1/2" of water. Let mat sit in water until saturated - several hours or overnight. Mat will turn darker once saturated. Nutrients or rooting solution are not necessary.
 Saturating grow pads
3. Grow mat should be moist - but not floating. Pour out excess water at the sink.
Day 2.
Planting Seeds
Rinse seeds thoroughly. Most seeds like to germinate in darkness.
Always read instructions on seed packet for pre-soaking, light preference, or special temperature requirements before planting.
Spread seeds evenly over mat. Don't be skimpy! Seeds should be almost touching each other. It doesn't have to be perfect - and it won't be - but you want good coverage.
 Sowing seeds.
Cover seed tray with humidity dome. Seeds need lots of humidity to germinate.
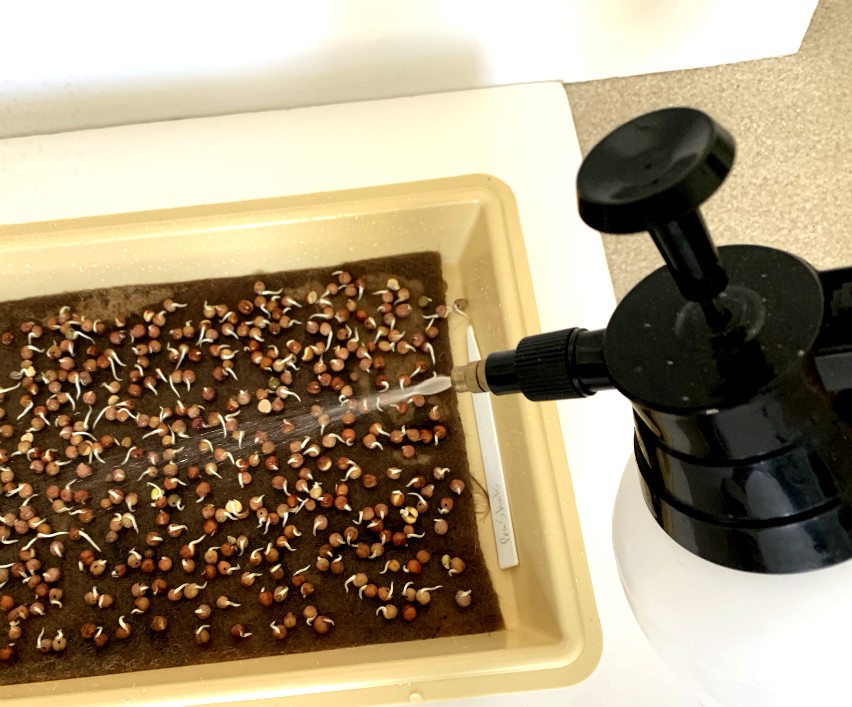
Water seeds by misting thoroughly once a day. As the Grow Mats absorb water, their unique fiber construction promotes air movement around the seeds which promotes root growth and prevents disease. Keep seeds and Grow Mats moist but not floating in water.
Day 3 - 4.
Watch Them Grow
Some mcrogreens (like radish) grow fibers from their roots that look like mold - but isn't. Look closely - if you see white fibers growing from the roots everything is okay. Fibers growing from the seed itself is mold however.
Grower Tip: It's not unusual to find mold on new seedlings. Mold isn't a problem if you take immediate action.
- increase air circulation by moving to a breezy spot or using a fan
- water less - mat should be moist - not floating in water
 This is not mold because fibers are growing from the new roots.
 This is mold
When seeds sprout they'll want light - and lots of it.
When you start to see tiny green tips emerging, move tray to a sunny window or under grow lights. Plants that start to grow without adequate light become tall and leggy - a condition that's almost impossible to correct.
Your new seedlings will start using more water at this point. Take care that they do not dry out. Keep the jute pad saturated with some water in the bottom of the tray (pads should not be floating however).
Water by pouring clear water in corner of tray, then tilt the tray to distribute water under the pad. The jute pad will absorb the water gently and evenly. If pads are floating, pour off extra water in the bottom of the tray.
Microgreens do not need fertilizer. In fact, nutrients can burn tender roots.

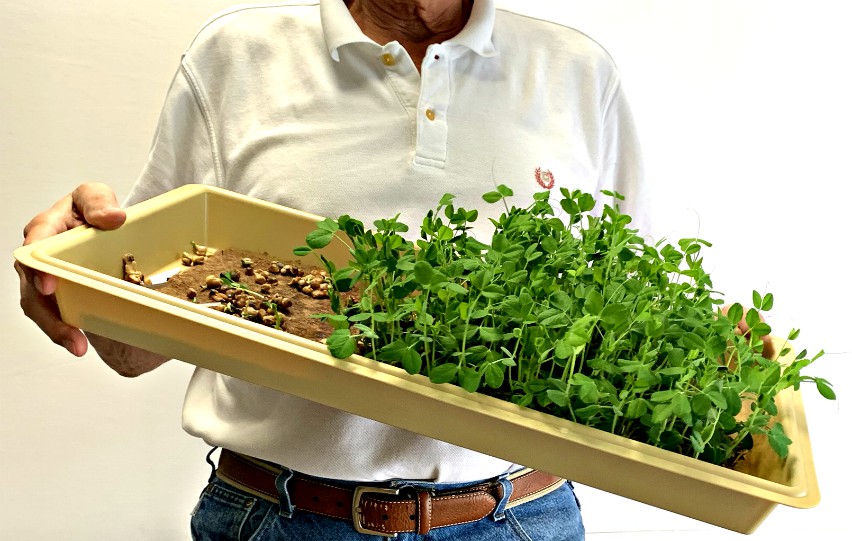
Day 8 - 15.
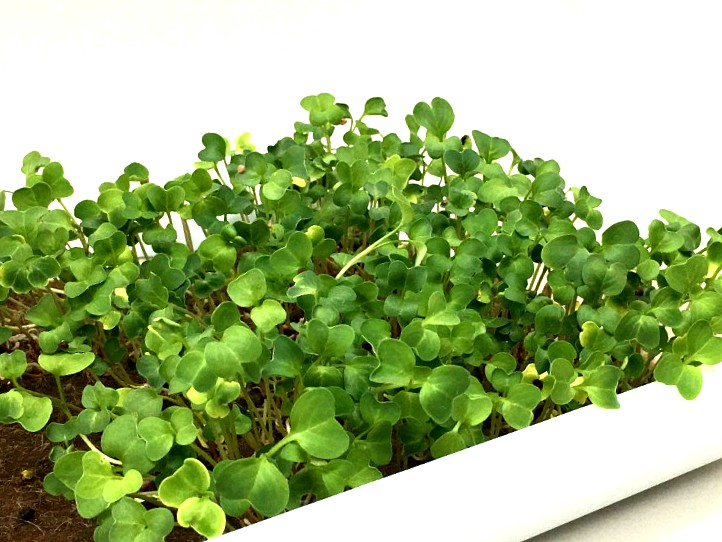
Tiime to Harvest
When the plants have grown 2-3 leaves - anywhere from 8 - 15 days depending on seed type - it's time to harvest. This is when microgreens have their best flavor. Wait too long and they turn bitter to taste.
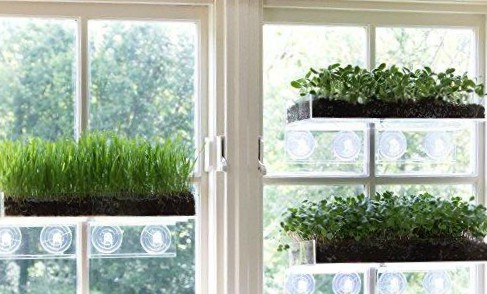
As the seedlings mature, the Grow Mats provide a clean, even balance of air and water at the roots. Healthy roots mean strong plants that will be loaded with flavor and nutrition!
 Healthy roots mean healthy plants!
When the first 2 leaves appear, your plants are mature (already!). This can be anywhere from 7 to 21 days after planting - depending on type of plant.
Microgreens start to loose their flavor and turn bitter if they're not harvested within several days of maturing.
 Time to harvest!
2 Ways to Harvest Microgreens
There are 2 ways to harvest micro greens: 1) snipping greens with a scissors just above the mat or 2) gently pulling entire plant from grow mat.
 Harvesting microgreens by pulling plants from jute grow mat.
Pulling plants from the mat keeps most of the roots attached. Roots are edible and they add crunch and flavor.
 Roots are edible and add an interesting crunchy flavor. Yum!!
Storing Microgreens
Of course, the freshest tasting microgreen are plants that are consumed directly from the grower trays. But microgreens will keep their "crunchy flavor" for a week or more when stored properly.
Simply put them in the fridge and keep them dry. That means no misting before cutting and no rinsing after cutting.
Line a plastic bag with paper towels to absorb moisture. Insert micorgreens between paper towels to keep them as dry as possible. Store in refrigerator.
 Preparing microgreens for storing in the fridge
Wash them in clear water at the sink and dry with a paper towel or a salad spinner before eating.
Enjoy!
|
Add a handful of microgreens to your cooking and instantly you'll become an amateur chef! |
